Minnie Mouse Headband DIY for less than $5
Minnie Mouse Headband DIY for less than $5
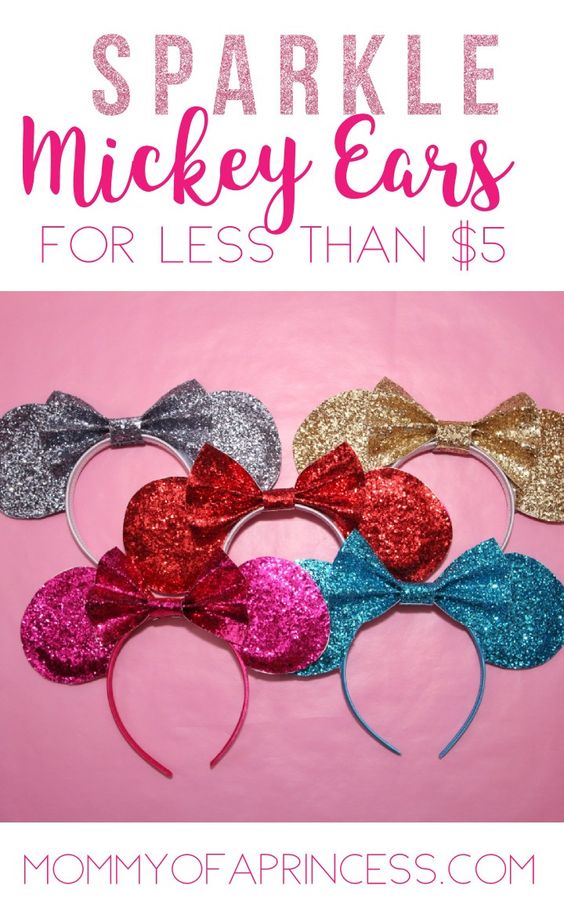
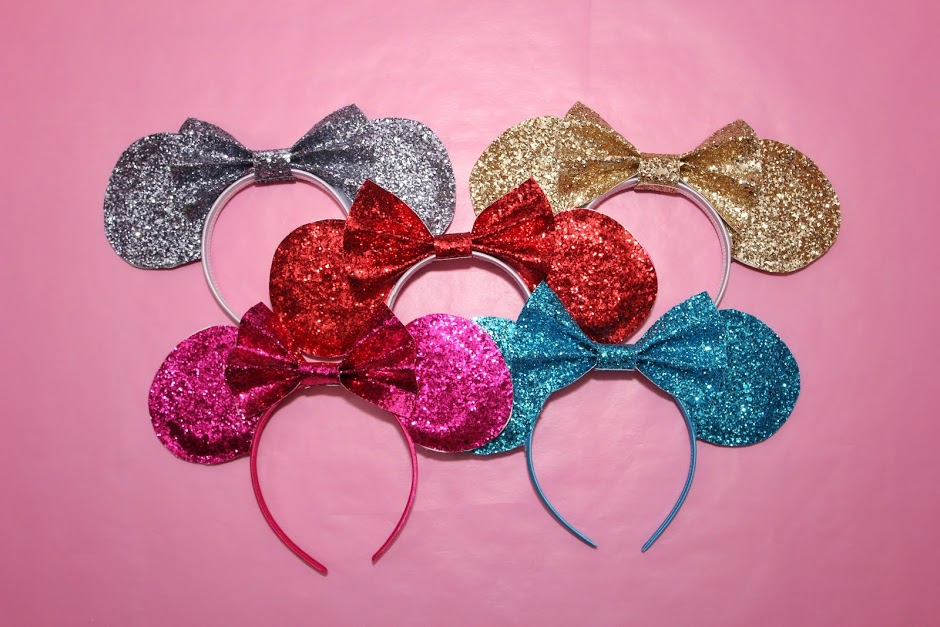
We made these adorable glitter Minnie Mouse Headband DIY ears at our #DisneyKids playdate. They were perfect for kids to wear, easy to make and cost less than $5 per pair! I ended up making several more in different colors to wear for our visits to Disney World. If you’re looking for a cheap and easy way to make Mickey Ears, look no further! Here’s my step by step tutorial on how to make these sparkly Minnie Mouse Headband DIY ears.
Planning a trip to Disney? Be sure to check out my Disney World Tips for First Timers. If you want a little extra sparkle, learn how to decorate Magic Bands with glitter in this tutorial!
Here’s what you’ll need to make the Mickey Minnie Mouse Headband DIY ears:
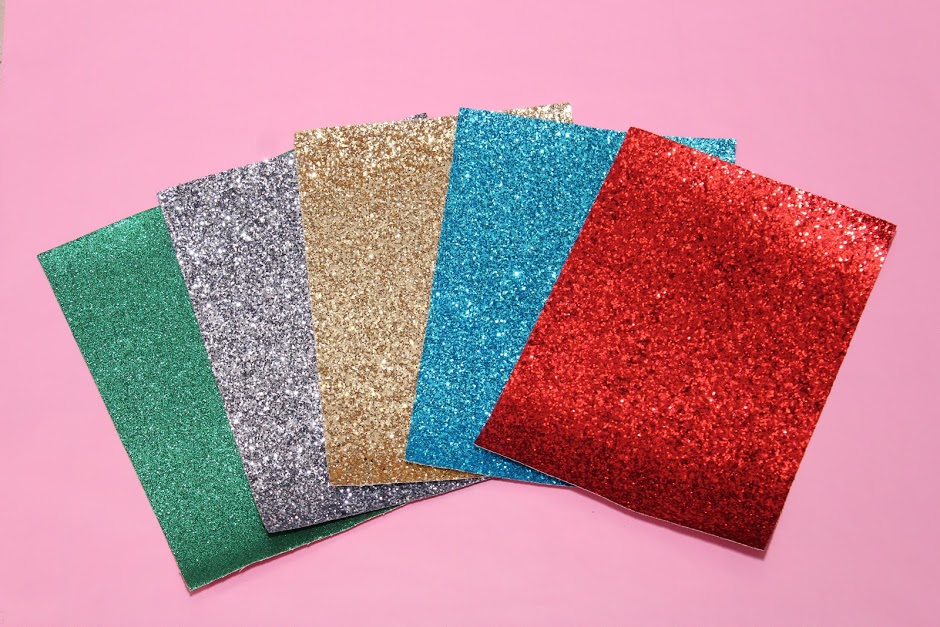
- Glitter Canvas Sheet (found at Hobby Lobby)
- Scissors
- Hot Glue and Glue Gun
- Small Zip Tie
- Fabric Covered Headband (DO NOT USE PLASTIC)
- White Craft Foam (Medium thickness)
How to Make Mickey Ears
These glitter sheets are available at Hobby Lobby for $1.99 each. They are canvas backs which means they’re water proof and able to withstand the humid Florida weather, unlike paper would. One sheet is enough to make one pair of DIY Mickey ears.
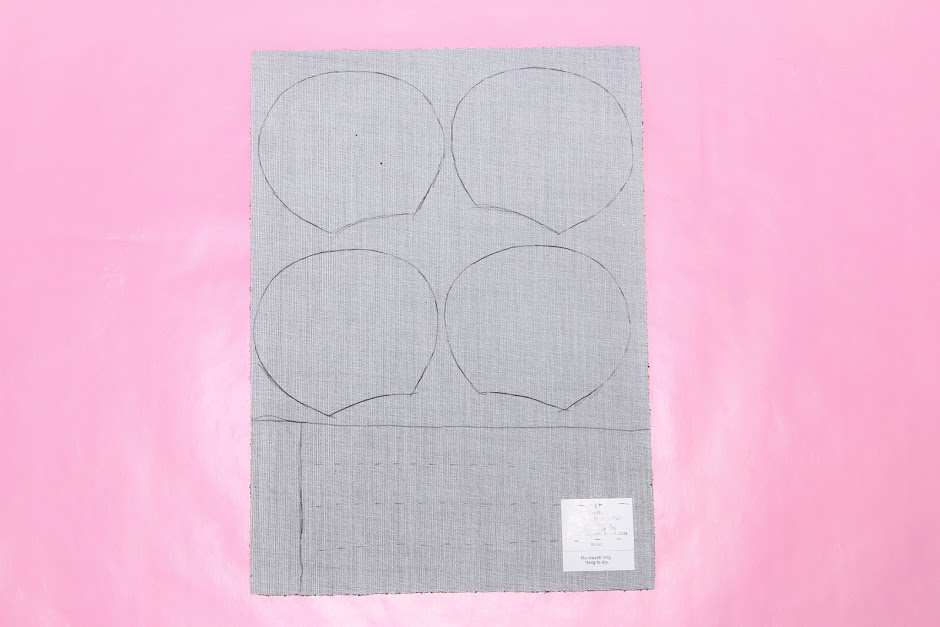
Here is a simple outline of what you’ll need. Four ear shapes and the bottom rectangles will make the bow. Cut all materials out and they should look like this (below). You will need white craft foam to insert in between the glitter ear pieces to give it stifness. I recommend cutting the white foam much smaller than the glitter sheets so the glitter edges touch together seamlessly. You’ll want a “sandwich” of glitter sheet, foam, glitter sheet.
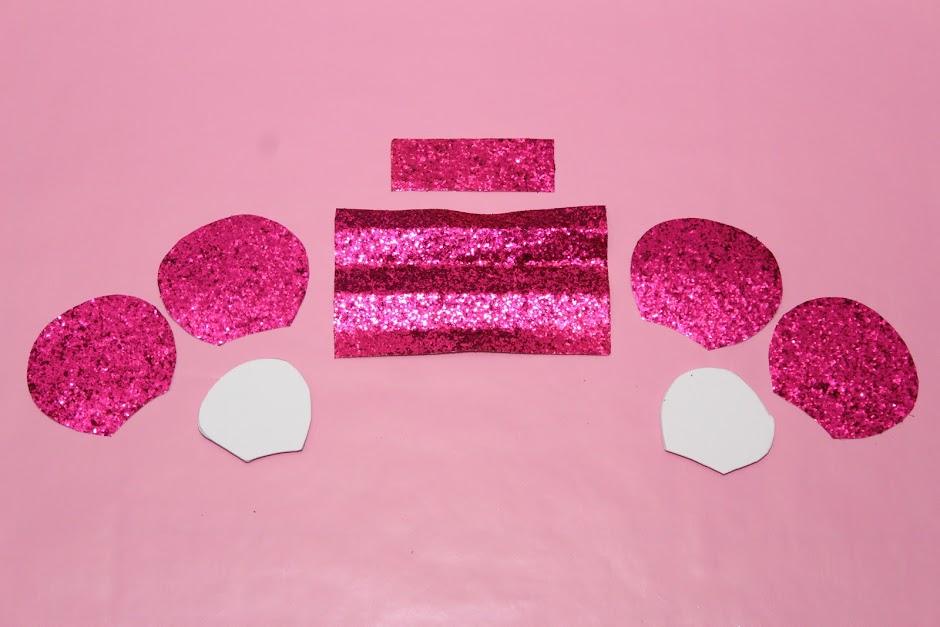
To make the bow, fold the rectangle accordion style like a fan. Pinch the middle and zip the the very center and then trim the extra.

Once complete you will assemble everything together, the two Mickey Ears and the bow in the center. I use hot glue to secure everything to the headband. It’s very important to use a fabric covered headband, not a plastic one, or the hot glue will peel off easily. Now your ears are ready to wear.
These Glitter Minnie Mouse Headband DIY ears are classy and perfect with any outfit. If you’re planning a trip to Disney soon be sure to pin this for your trip.